
Well, let's be honest ... when you luck into a find of this size, you have no real option but to put them high and low! Fear not, Dear Hubs ... this was a STEAL and I just simply got the deal of a lifetime, hence we have so many :). (that should do the trick!).

So now that every spare frame, every decorative accent, every ... well, everything has been covered in these fashionable mollusk; I turned my attention to a new little sassy votive that is just perfect for my family room side table. Zsa Zsa has already set her sights on one of these as well and she was pleased as punch when she found a ready made votive with her name on it last week!

Here's what I needed:
- Shells
- A candle plate (a glass plate typically in the craft store near the candle section)
- A small glass votive
- Super Glue (clear gel works best)
Here's what I did:
1. Begin by gluing the votive onto the plate in the center. Let it stand overnight or more until it is completely dry and doesn't move to the touch.
2. Begin by laying out the shells in a pattern fanning out like flower petals from the votive center. You will want to try a few different directions, shapes and sizes before you settle on the pattern that works. Remember, nature isn't perfectly symmetrical and so your shells need to be put together like puzzle pieces.
3. Glue the base layer and repeat for a second layer.
4. Let the beginning base layers dry overnight.
5. Repeat the process as above with more shell layers. This time, direct them more vertical rather than out. Think about the natural progression of flower petals as you place the shells.
6. Once complete let it dry overnight.
7. Review your handy work. Where you see "holes" where the glass is blatently showing through in large form, go back and nudge a smaller shell in the hole to fill the space. It makes the look of the overall piece more full.
 |
| Step 1 |
 |
| Step 3 |
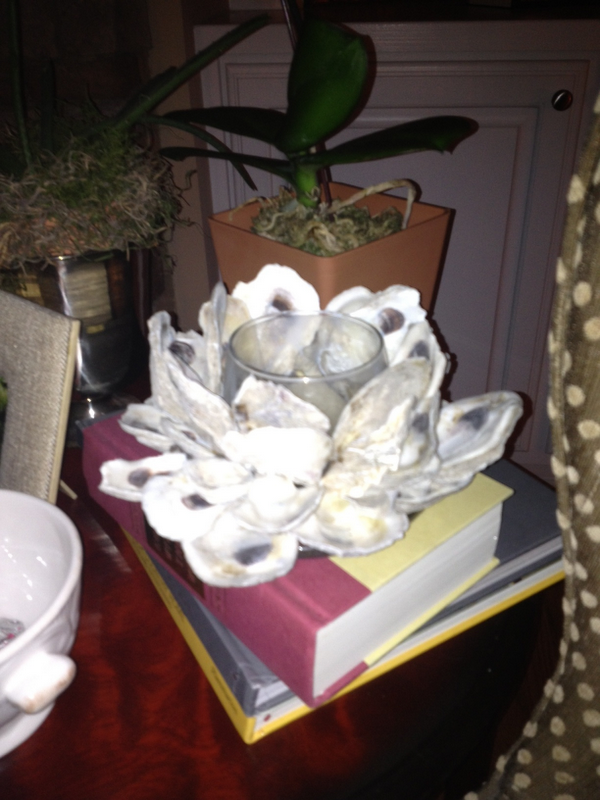 |
| FINISHED! |
Voila! I'm just simply smitten with the outcome!