September 29, 2011

More Football Wreathes!

I guess I've gone overboard now ... my middle name may be "football wreath"!  I originally shared a few examples of this adorable wreath earlier this fall.  After making countless Georgia, Georgia Tech and who knows whatever other school football wreathes for family and friends; I've been recruited by War Eagle Friend J to make two MORE wreathes for J's friend.  J's darling wreathes have been featured on her front doors for two years now, and her friend just had to have a matching set!

And so ... it's back to Hobby Lobby I go.  This time in search for some additional orange and blue ribbon and perhaps a few Halloween odds and ends that are too irisistable to pass :).

My fave part of these projects is that each set turns out a bit differently and has its own creative personality.  So, dear J's friend ... hope you love them!


This post is partying over at CSI

September 27, 2011

Behind the Scenes

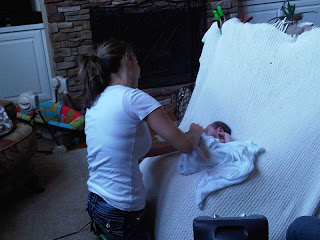
I guess it would make sense that unless you have a newborn babe, you wouldn't know exactly how those adorable baby photo shoots happen and what's involved with snapping those cute perfectly sweet moments.  In my blissful ignorance, I just assumed that the photographers snapped five billion shots and hoped that some of them turned out, but that was waaaaaayyyyyyy off.  Instead, a calculated routine is completed that lulls the baby into a deep sleep.  Then, the photographer, with all of their talents; molds the babe like a big ball of clay into the cute poses you see in the pic.  It is truly an art form and somewhat amazing. 

For Baby B's newborn shots, we used the talented Jody Lynn of Jody Lynn Photography.  If you are in the Atlanta area, she's fantastic with children and you should definitely check her out!

Here's a few pics of her behind the scenes footage as she captures the adorable images we just love of Baby B in his first few weeks on this Earth. 


And, the finished product just couldn't be any cuter!  Is it crazy to buy prints of EVERY one of them???


September 23, 2011

Bloggy Best: The Fall Bucket List

Thank you, thank you, thank you Loves of Life for this adorable Fall Bucket List for this season.  This is such a cute idea I just can't even stand it. 


As part of my fall decor, I framed this little cutie and we will use a dry erase marker to update as we go.


So scoot on over to her blog to download this now and start keeping track of your fall festivities in such a cute way!  Hmmm..... now I think I need one of these for each season and just may make my own- upcoming craft warning, get ready! :)

~charmed, b

September 21, 2011

Communication Station

With good intention, I set out to get organized this week and make sure we had all of our ducks in a row now that Nanny D will be staying at the house with Baby B each day.  I know that to balance my already crazy juggling act of full time job, small business, household administration, activities and mommyhood that we absolutely must be super organized.  Ok... perhaps SOME of that need for organization has to do with the little thing called my "Type A" controlling personality, but for the most part I will speculate that the need for organization is mandatory nonetheless. 

So, armed with some extra burlap from my fall decorating; I had the great idea to create a communication station in our laundry room to give my controlling side a little sigh of relief.


The new little addition of a basket for mail and odds and ends as well as 3 clipboards will hopefully (fingers crossed) ensures that we stay on top of our game when things get a little crazy.  The 3 clipboards have been designated for (a) Nanny Notes: to keep post it requests at bay, (b) Shopping Lists: for reminders of things we are out of and need to pick up while we are out and about and (c) A multi-month calendar: because when travel schedules pick up Dear Hubs, Nanny D and I need to know who's where when!

Here's how I did it:
Supply Round Up:
  • Basic clipboards - I bought mine at an office supply store for $2 a piece
  • Burlap scraps
  • Ribbon
  • Mod Podge and brush
  • Marker or straight edge
  • Scissors

Craft in a Flash:
1.  Cut your scraps of burlap to fit the clipboards.  I wanted my burlap to be like a band around the bottom half of the clipboard.  To do this, I cut a strip of burlap that covered the front and wrapped around about 1 inch onto the back.
2.  Measure where the burlap embellishment will be and mark it with the marker and straight edge. 


3.  Using the Mod Podge, coat the marked off area (from above) with Mod Podge and affix the burlap.  Then, coat the burlap with a heavy dose of Mod Podge on top of the fabric.  Be sure to go over the edges onto the clipboard - don't worry, it dries clear. 
4.  Once the front is covered, complete the same steps on the back edges that wrap around. 
5.  Let the board dry completely.
6.  Add ribbon or other embellishment to the top of the board.  For mine, I added a cute leopard ribbon and some sweet 1-2-3 tin tags that covered the metal clipboard clip almost entirely.
7.  Hang cute paper on each board.  For mine, I created templates for "Beckham's Babbles:  Notes With Nanny D" so that we can keep track of odds and ends that would otherwise be sent to post its as well as a shopping list and calendar. 


8.  Hang (along with a pen or pencil) and get organized!

~Charmed, b

This post is partying over at A Mommy's Life

September 20, 2011

Bee-st Weekend

It's official, fall is upon us and I couldn't be more pleased!  The leaves are starting to turn around these hilly parts and while I know we have at least one more flash of Indian Summer ahead, I'm giddy at the cooler temps I wake up to each day! 

We had a wonderful weekend this past week and had good times with family and friends as always.  Due to tennis matches, tailgate parties and nap schedules; we didn't make it to see our alma mater bumble bees take on and school Kansas on how the game of football is played this past Saturday.  Instead, I did my part by taking this adorable cake to our pot-luck tailgate party.  Ya'll will recall that this pan was deemed as one of my fave things and a gift for my birthday this past summer.  I just love it!  It was a hit; adorable AND tasty to boot!


And, I wouldn't be doing my part to show my Yellow Jacket pride if I didn't include this cutey.  Thanks to Jody Lynn, this adorable pic is now hanging in the entry to my basement rec room.  We love our Baby B :)!


Go Jackets - what's the good word!

~charmed, b

September 16, 2011

S'more Fun

Our backyard re-do is in the final stages and simply waiting the arrival of a few last chairs to complete the entire make over.  All this, just in time for the cooler weather and time to enjoy the fun new space!  Over the past week, we have had the opportunity to have friends over not just once, but TWICE to break in the new firepit.  As a self proclaimed s'more nut, I'm just head over heals to have a big outdoor fire and s'mores twice this week! 

After our first round, where dear Little S proclaimed me to be the hostess with the mostess and "so organized" after she saw that the complete ingredients for the perfect s'more were tucked away in the pantry in their own containers; one for marshmellows, one for graham crackers and of course giant Hershey bars.  So, to top that accolade from my ten year old fan, I just had to come up with a cute little touch for our next s'more-tivity fireside.  This time, individual s'more packets were on the list and were all the rage with the kids and adults alike.


Here's to s'more!

~charmed, b

September 15, 2011

Porch Pillows

Heavy sigh... my, my how time flies.  This time last week, I was knee deep in craft projects soaking up every last second of my last few days at home.  Now, it's onward and upward as I've gone back to work part time and spent the rest of the week running necessary errands, appointments and odds and ends before I start back to work full time.  I thought if I stuck my toes into the water before I jumped full in that things would be calm and completely under control.  While the week has been good to me, I'm just now getting around to posting some of the adorable projects I did on my crafty vaca last week!

One thing that has been on my to do list for some time now was to revamp the pillows on the front porch.  I just love my front porch and the four big rocking chairs that sit upon it.  It feels so welcoming to me and well... so southern :)!  For the better part of the last year, gold gingham pillows with little bees embroidered all over have sat in each of the chairs and welcomed guests to come and sit a spell.  Well, these cuties have surely seen better days and the hot summer sun did a number on them leaving them a drab blah color in need of a redo. 

The "Before"

And so, armed with a love for all things burlap right now and an idea of how cute monogrammed or personalized pillows would be; I set out to whip up some cute new designs that would make the porch pop this fall.  Sure, I've seen some darling burlap pillows on the pages of my favorite catalogs, but with a price tag of over $60 each I decided to pass because I'd certainly prefer to invest over $200 in something more meaningful and useful (new shoes for fall!).  This led me to my hunt for affordable pillows and a little craft project.  In the end, I now have some super cute, personalized pillows to toss around and welcome our friends!

New Burlap Beauties for the Porch

Here's how I did it:

Supply Round Up:
  • Pillow covers
  • Fabric or acrylic paint
  • Paint brushes
  • Paper (scrap)
  • Scissors, tape and marker (for tracing)
  • Template


Craft in a Flash:
1.  I secured plain burlap pillow covers.  I found mine on ebay for a very affordable price. 
2.  Print off a template for your monogram, letter or other personalization.  My choice was an oh, so simple giant "m" letter.  To make my template, I simply selected the font of choice and a very large font size; then printed it out.  Does it get any easier?


3.  Insert a piece of scrap paper inside the pillow cover FIRST.  This will keep paint and marker from getting through your cover onto the back of the pillow.  This is especially important if you use an open weave like burlap! 
4.  Cut out your template and decide where you want your design.  If you are doing multiple pillows that need to look the same, be sure to measure the position of the template so that you can copy the same measurements for your other pillows.  Tape the template to your pillow cover.  I used a little bit of tape on each of the straight sides of my "m" so that it would stay pretty flat.  Trace around your template and ensure that your lines are very straight (or plan to paint outside of them).  Remove your template when you are done.  Be sure to keep the template in good shape if you plan to do multiple pillows so you can reuse it!
5.  With paint, trace around your letter first.  Then, fill it in with additional paint.  You may need to do a few coats of paint to get a good cover.


6.  Once dry, insert your pillow form and voila ... super cute and super inexpensive new porch pillows!


~charmed, b

This post is partying over at A Mommy's Life


September 12, 2011

All in a Day's Work

Well last week sure was a fun one!  It was my final week before heading back to work, so I spent most of my days spending as much time as possible with Baby B and then the downtime was spent crafting a few new creative touches for the house, pulling out the fall festivities and enjoying some time with friends.  So ... once I actually slow down and catch up enough to upload some pics, there are a few fun posts in store!

Ya'll give this workin' mama some slack and I promise to be back lickity split :)!

September 07, 2011

Celebrating Two Months with Back Flips!


While I typically save these sorts of baby diary moments for our family blog (if you are a friend and would like access - just email me!), the proud mama in me couldn't help but be elated to share with everyone!  I can hardly believe it, but Baby B is two months old today.  It's official ... time is flying by us!  In some regards, it seems like a lifetime that he has been here and I can't hardly imagine what I did before spending my days and nights with him.  But, on the other hand, things are moving so fast that it seems like I will blink and be sending him off to college! 

The past few weeks have been full of giggles and smiles (him and us!) as his little personality is starting to take shape. The highlight of the month came with only minutes to spare before his official 7:45 am birthday when he figured out how to flip over in his crib from his tummy to his back.


Baby B loves sleeping on his tummy and we let him do so for supervised naps most days. I have noticed that over the last week or so that he has become much more alert when in this position. He assumes a very rigid plank posture like a baby yogi and can lift his legs and his head off the ground at the same time. Now, he has figured out how to combine this pose with the comforting little "frog" pose where his legs are tucked up tight under him.  I'm telling you, it's the cutest thing ever when he tucks those little legs up!  And so, the obvious next step ... he tries as hard as his little might lets him to push those little legs up hard enough to flip over.  Most of the time, after about five minutes of such strenuous activity, the little guy gives up and admits defeat; but not this morning!

After his "breakfast" bottle around 7am, it was obvious he wanted a little more naptime and so I placed him on his tummy in his crib. From the video monitor in our room, I caught the perfect glimpse of Baby B executing the perfect gymnastic flip as he rolled over to his back. I'm not sure which of us was most surprised - him or me!  

Dear Hubs was asleep for all these crazy antics ... well, he was asleep until I smacked his arm and proclaimed "he flipped!". The response was something a little more groggy but nonetheless proud. I watched a few more minutes as Baby B tried to flop back to his tummy, but after no success and a few loud cries - I went in to rescue him and put him back on his tummy to sleep.

And so begins our new month with the babe! Given this morning's gymnastics, I'm sure it will be an active one!

September 06, 2011

Farewell Summer


Where did the time go?  In the blink of an eye, I went from wishing for warm, sticky summer days to ready for the football season's best!  We dodged the rain showers this weekend and celebrate the final summer time weekend with a fish fry with friends, a super fun brunch at Horseradish Grill, jazz music on the patio at our fave local pizza spot and good times with friends and fam.  This summer was a wonderful blur full of fun to say the least!  While I have a few more weeks before it's time to start pulling out long sleeves and boots, the fall like weather this morning certainly had me in the mood!  And so, to celebrate the last few warm days of summer ... the perfect slice of strawberry pie!   

September 02, 2011

While You Were Sleeping

In hindsight, perhaps it was a bit irrational, perhaps a bit spontaneous ... but during Baby B's napping, Dear Hubs and I decided to do a little domestic project and overhaul our closet flooring.  Ok, saying it now; I'd tend to agree this seems overzealous and ridiculous - but hey ... we are new parents so a bit of slack is in order. 

When we built our current home, one of my primary requirements was a closet spacious enough to house all of my clothes without seasonal rotation and ample space for my somewhat extensive shoe collection.  The master bedroom closet is positioned conveniently over the garage and has similar dimensions, so my wish was granted!  The closet has been sporting beige carpet for 5 years now and with time, dust bunnies and two dogs who love to sniff around it has just gotten dingy.  So, when a great deal on hardwood presented itself as a "special" at our big orange favorite Home Depot; we new it was time to channel our inner do-it-yourselfer mentality and replace the flooring. 

Since Baby B is only a few weeks old, our naive assumption was that he would take a long nap and we could saw, hammer and complete the project while he slept.  Well, that was only somewhat accurate and my attention bounced between project and the babe most of the morning. 


Before: Overcrowded, Disorganized and just plain BLAH!

In Progress ... Carpet be Gone and Hardwood on the Way!
Once complete, the floors made such a difference that we just had to take it a step further and make a few other minor mods to finish the job.  A large initial plaque (from Hobby Lobby) and some stencil decals (from JoAnne's) provide a few decorative touches and coordinate with black and white damask storage boxes (also from Hobby Lobby).  Dear Hubs assisted by (finally) hanging two racks of hooks for my scarves to neatly hang.  Before, they were banished to a crowded drawer where only two or three faves ever saw daylight.  My jewelry boards were rehung by the window and now thanks to some re-organization can easily be reached.  Oversized purses and totes were organized on the back of the closet door while the remaining clutches, bags and other accessories were also organized to keep them in plain sight.  Lastly, a little folding, shoe organizing and a little tidying up of the area completed the job.  I did my best sales pitch for a series of chandeliers to round out the space, but given Dear Hubs' extensive height ... I didn't push too hard when vetoed.  Voila ... now that it's complete, I love how orderly and organized everything is and just hope it stays that way!

Voila!  Clean and Neat Finished Product

Necklaces and Scarves are Neatly Organized and Ready to Grab

Oversized Totes are Visible but Out of the Way!

September 01, 2011

Zsa Zsa's Birthday

One thing is for certain, every year at the end of August, our family gathers together to celebrate Zsa Zsa's birthday.  You could set your watch by it.  Zsa Zsa just loves the fact that we all get together and have a family party in her honor.  And, the day wouldn't be complete without at least one proclaimation of "Happy Birthday to Me!".  It's actually very cute how much she just loves this day and I think her love for parties, celebrations, gift giving and time with family is what has instilled that same love in me and LaLa. 

This year, the weather complied and our celebration consisted of a lazy afternoon together capped off by a BIG low country boil.  A fam favorite ... the low country boil consisted of plenty of crab legs, shrimp, sausage, corn and potatoes.  Just when we thought we didn't have any more room after the delish meal, we indulged in a homemade almond cake compliments of moi and ice cream. 


The delish crab legs are a fam fave - fresh from the boil!

Pasta salad in individual jars - tied up with a coordinating bow

Nana is ready to dig in!

The Birthday Cake - almond cake with buttercream frosting
Happy Birthday Zsa Zsa!

A wonderful meal and wonderful time with family ... this is what makes great memories!  Happy Birthday Zsa Zsa!